From Soap to Seal
Learn how to make your own seal inspired by those from the ancient Near East.
Time: up to 60 minutes
Age Range: 5 and up
How old are seals?
Stamp seals and cylinder seals from the ancient Near East were used in Mesopotamia in the 6th millennium BCE—almost 8,000 years ago!
How were they used?
The earliest seals were used to keep track of who bought and sold an item. Later on, seals were also used as a way to mark ownership or a person’s identity and may have been used as amulets to protect against bad luck. Seals were stamped or rolled onto soft clay to seal and secure jars, doors, and boxes, which also showed who owned them. For this reason, seals can tell a story about the owner of the seal and daily life of the ancient Near East.
Now let’s create our own seal!
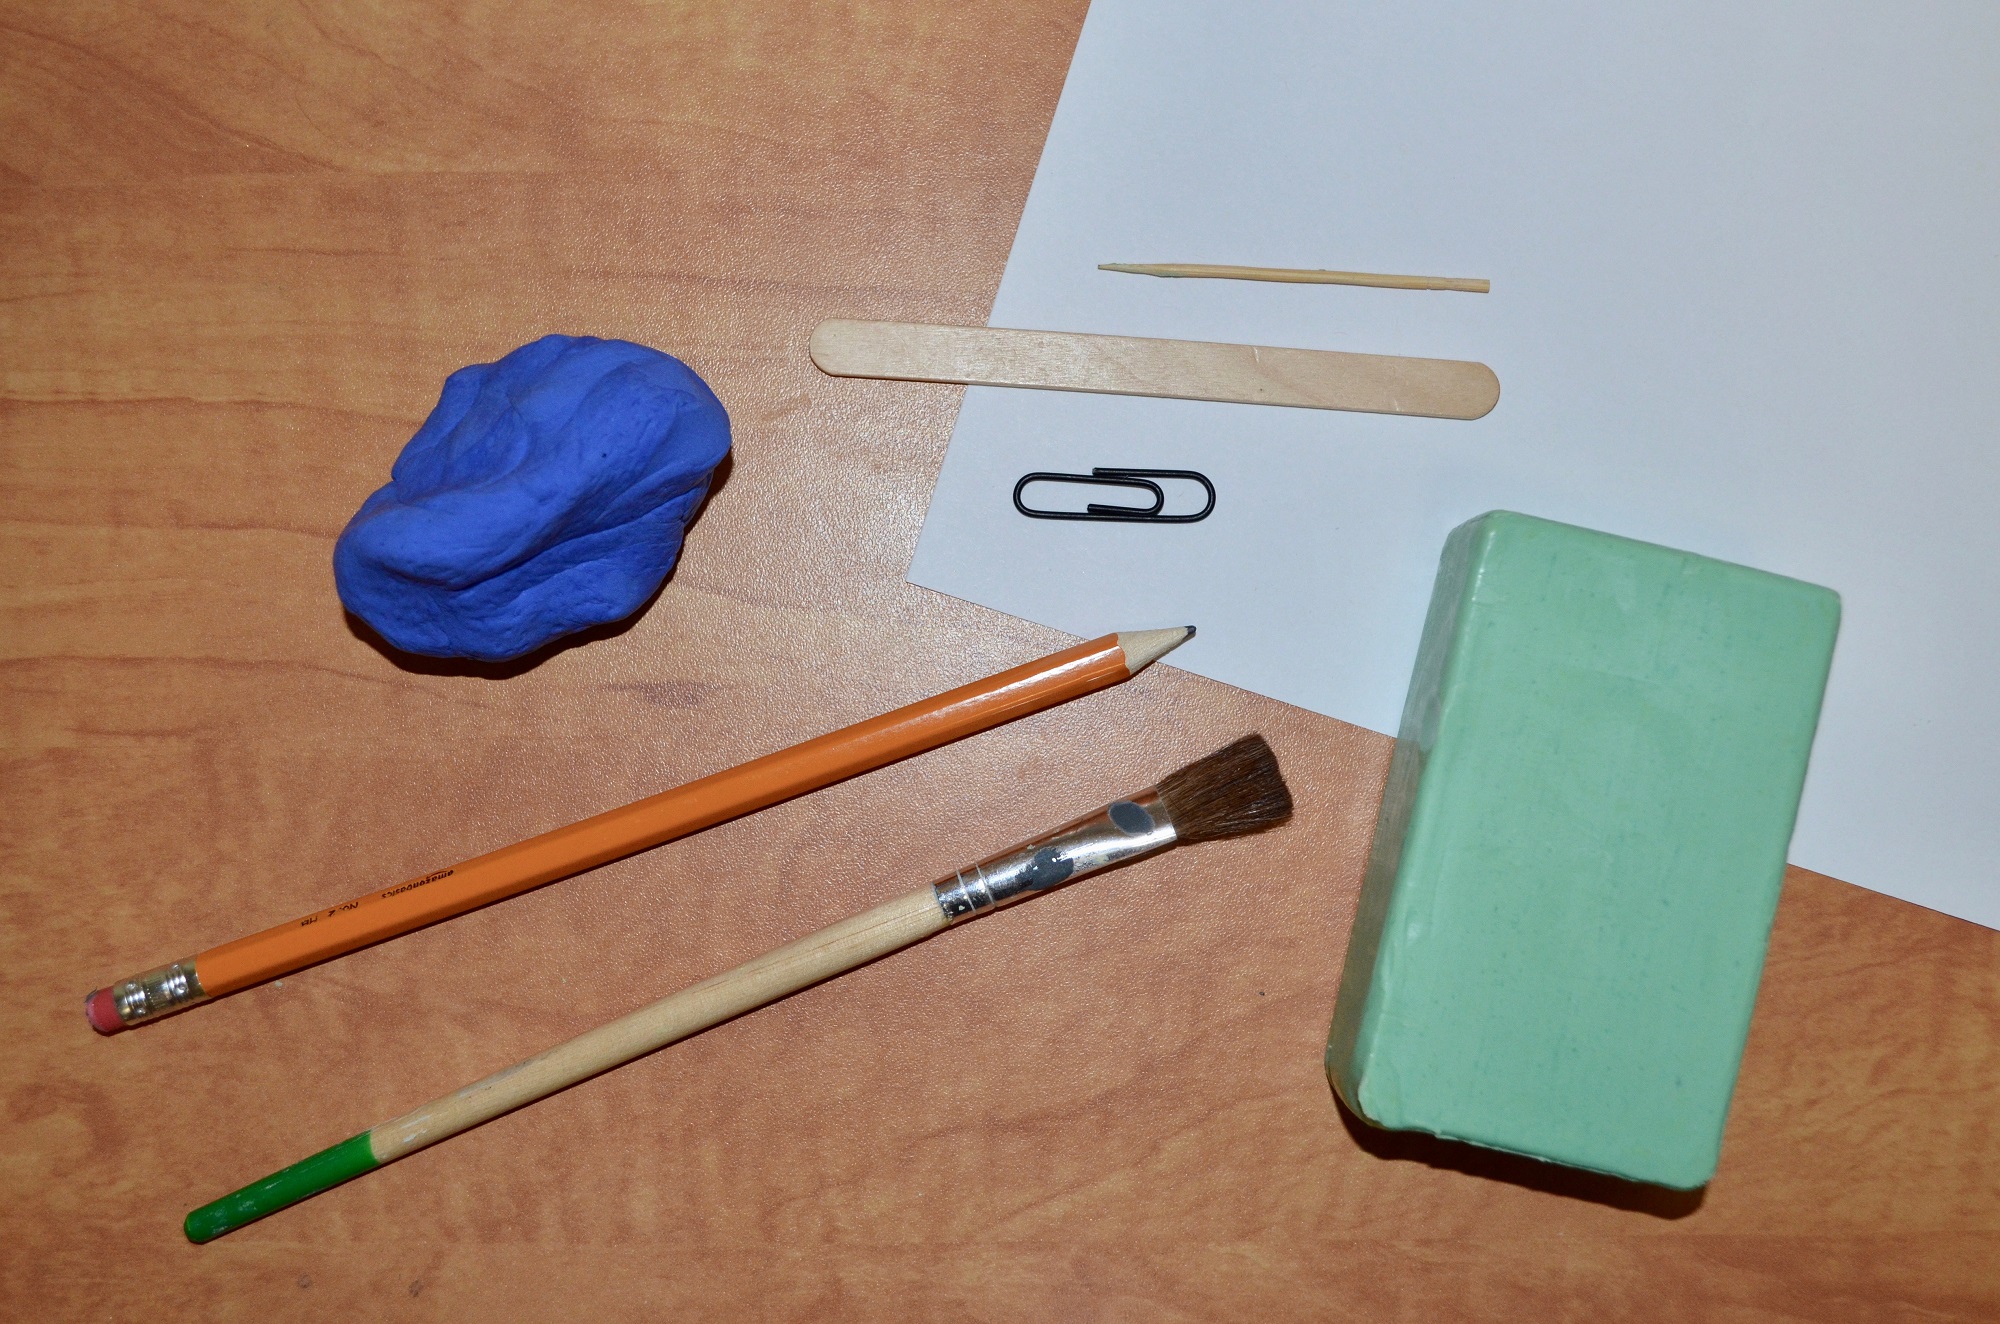
What you need
- Air-dry clay
- 1 bar of soap
- Other options include:
- A wax candle
- Foam
- Clay
- Carving tools:
- Paperclips – perfect for digging and creating curves
- Toothpicks – for hard-to-reach places
- Spoons – great for scooping
- Popsicle sticks – to carve bigger shapes
- Paintbrush – to brush away soap shavings
- Paper – to plan your idea and create a sketch
- Pencil – to trace your sketch
Steps:
Step One: Brainstorm a meaningful symbol
What are you going to put on your seal? The images on ancient seals were important symbols that showed people's interests, jobs, or backgrounds. Pick a symbol that means something to you.
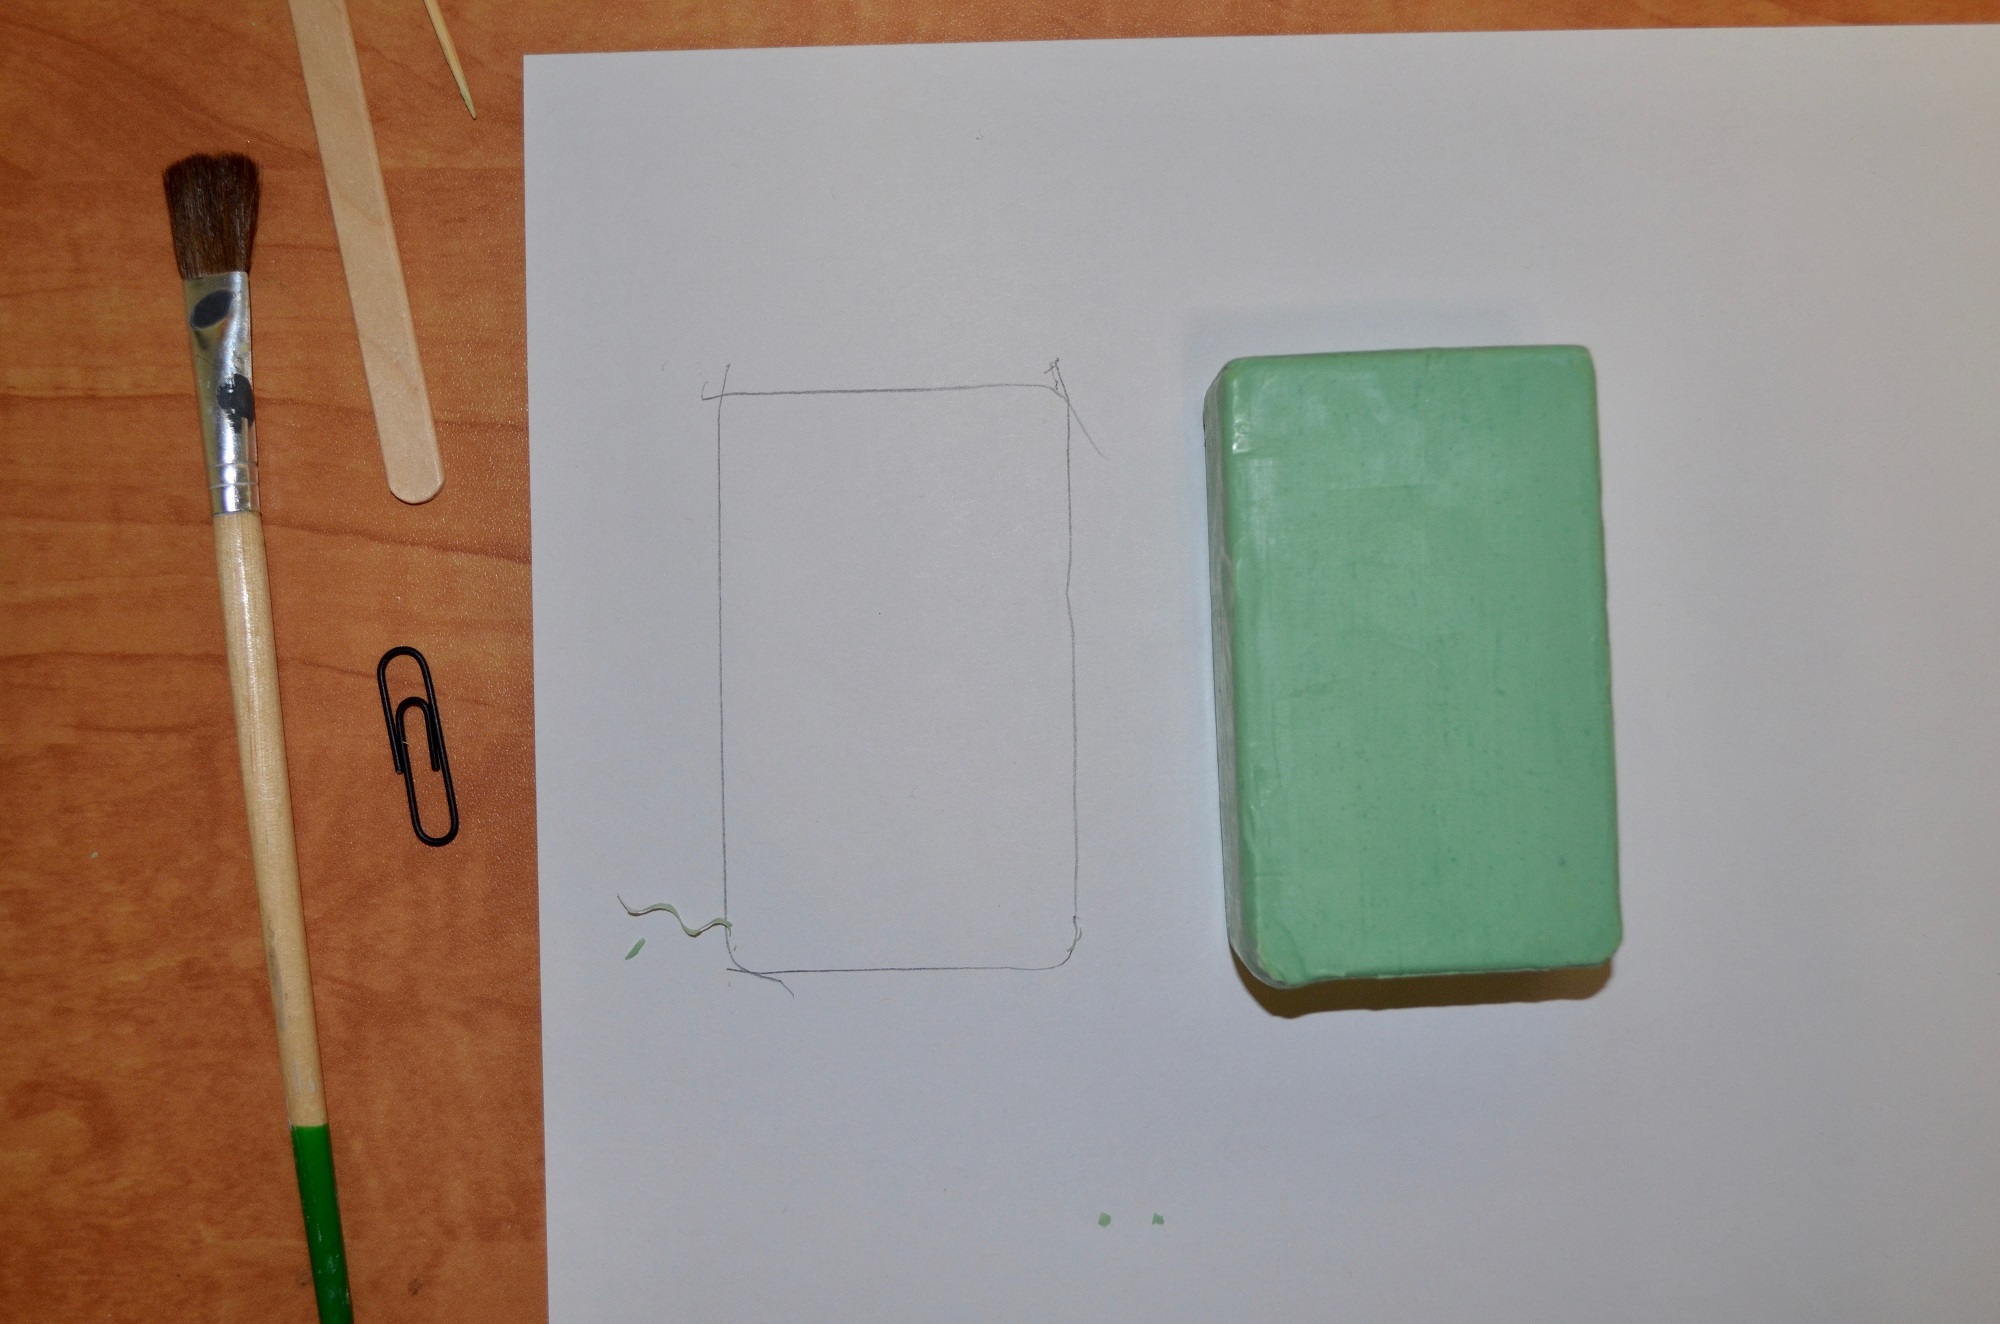
Step Two: Sketch your symbol
Before turning your bar of soap into a seal, you need to plan out your design. To get started, trace the shape of your soap on to a piece of paper. This will help make sure your design is the appropriate size. Then, sketch the design you will carve into your stamp seal.
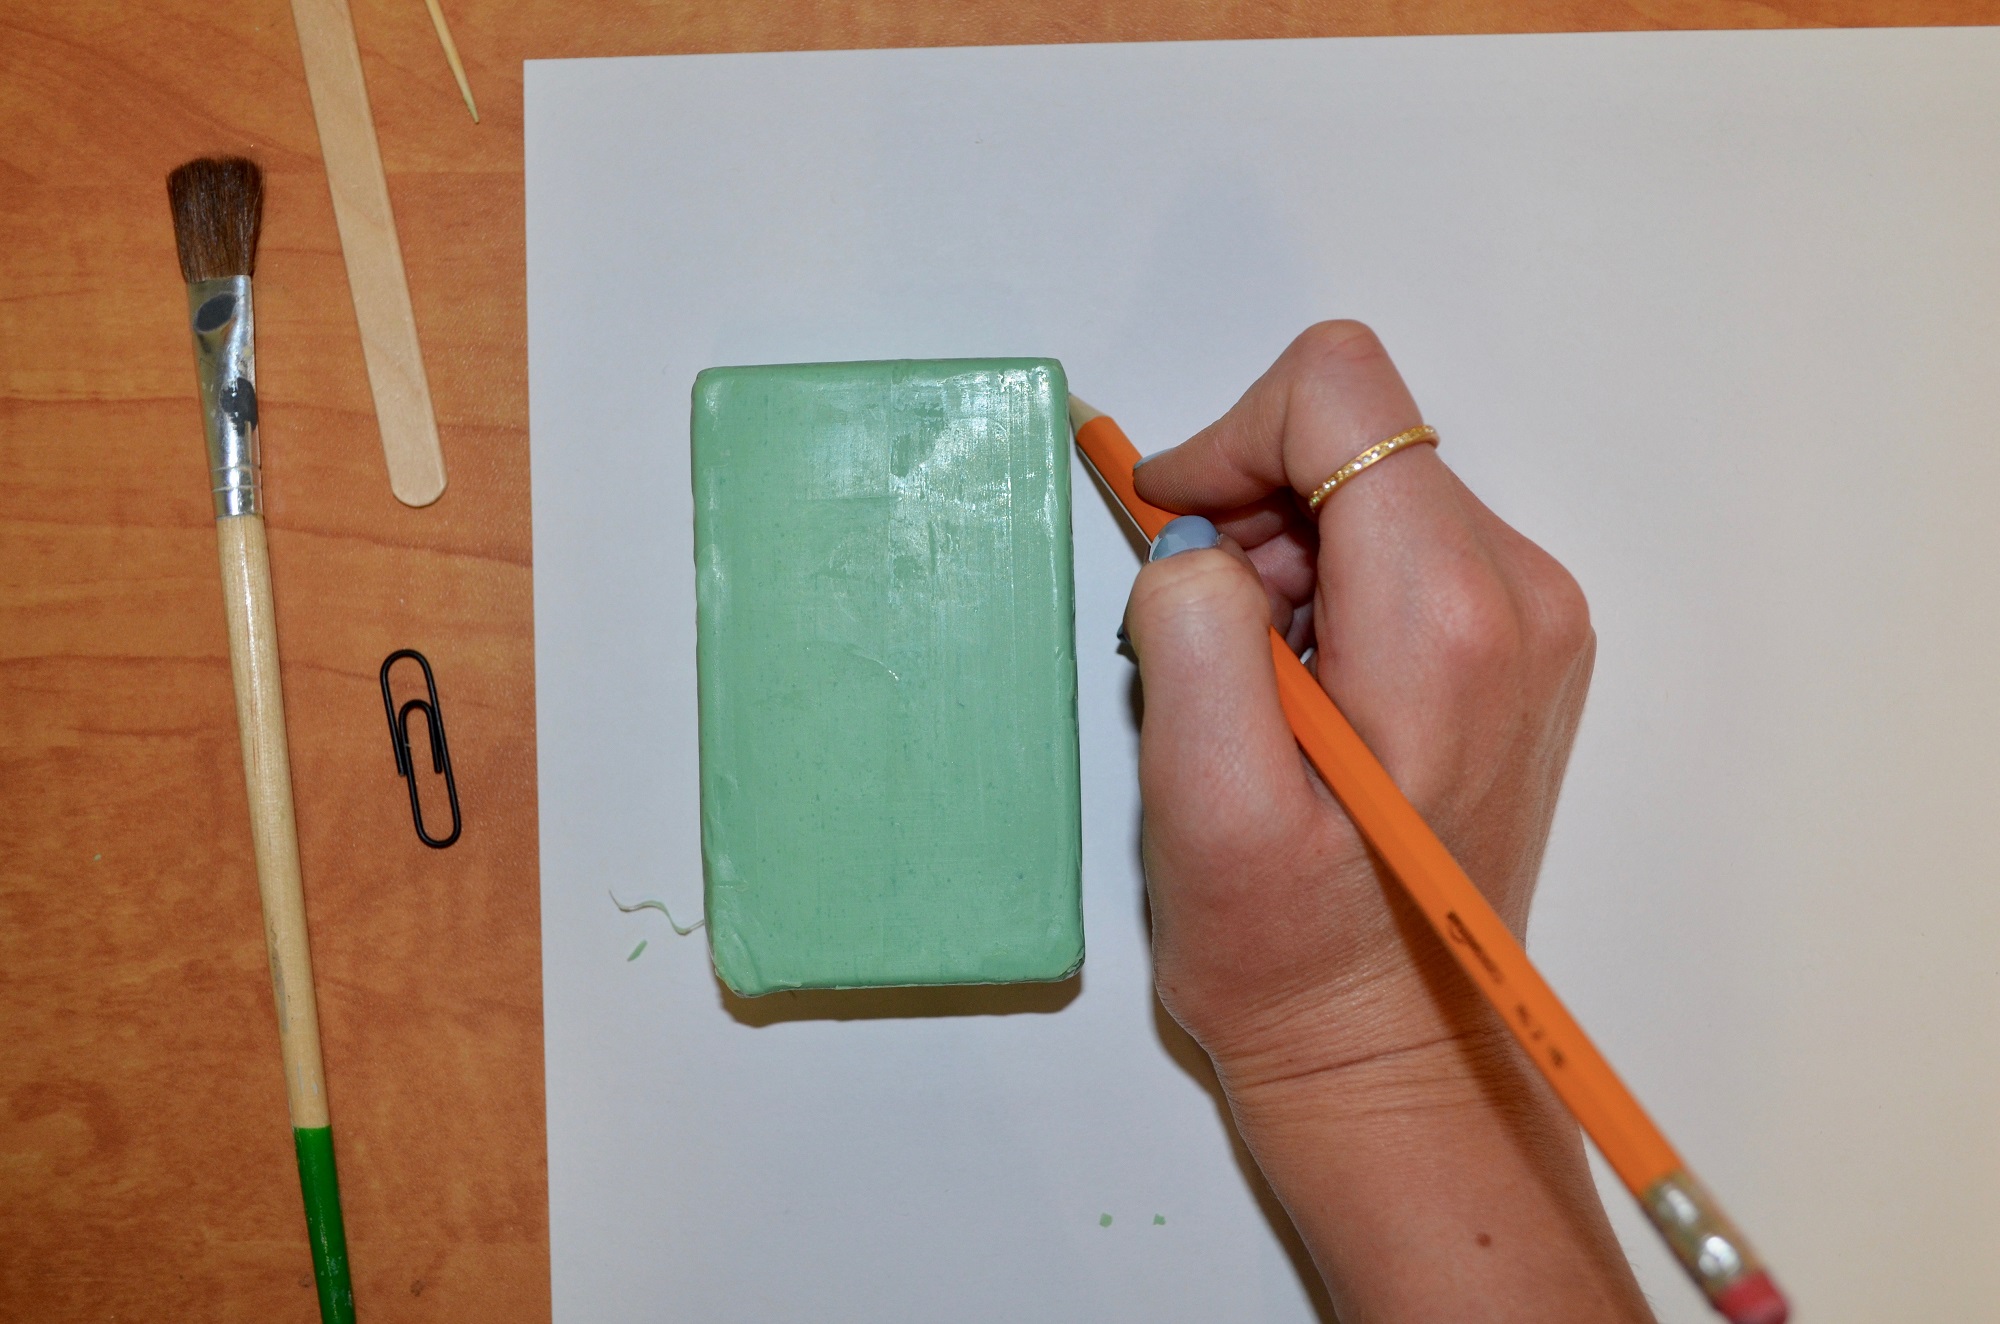
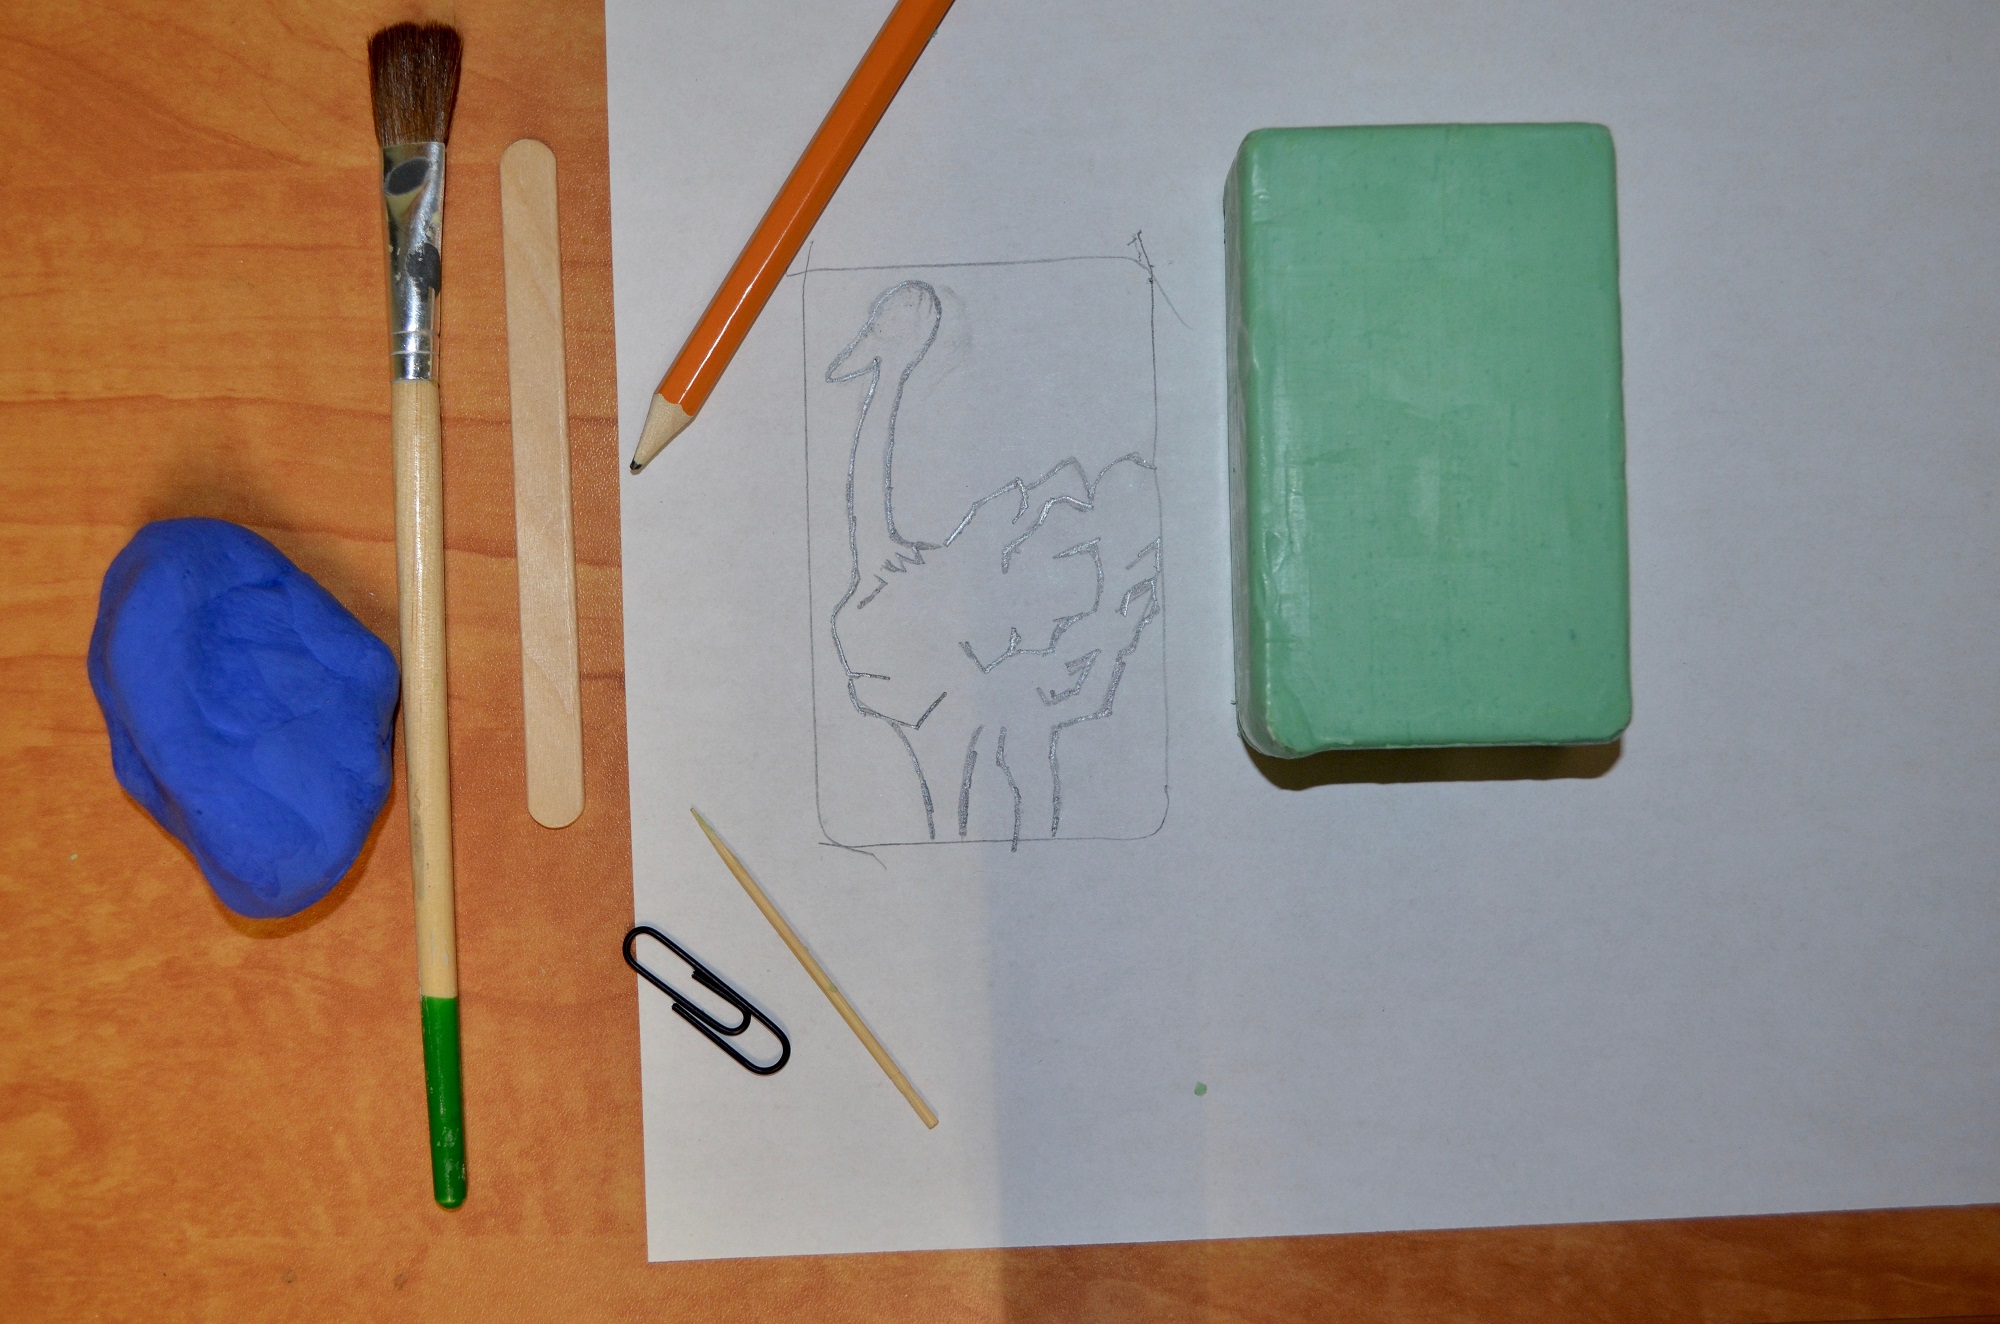
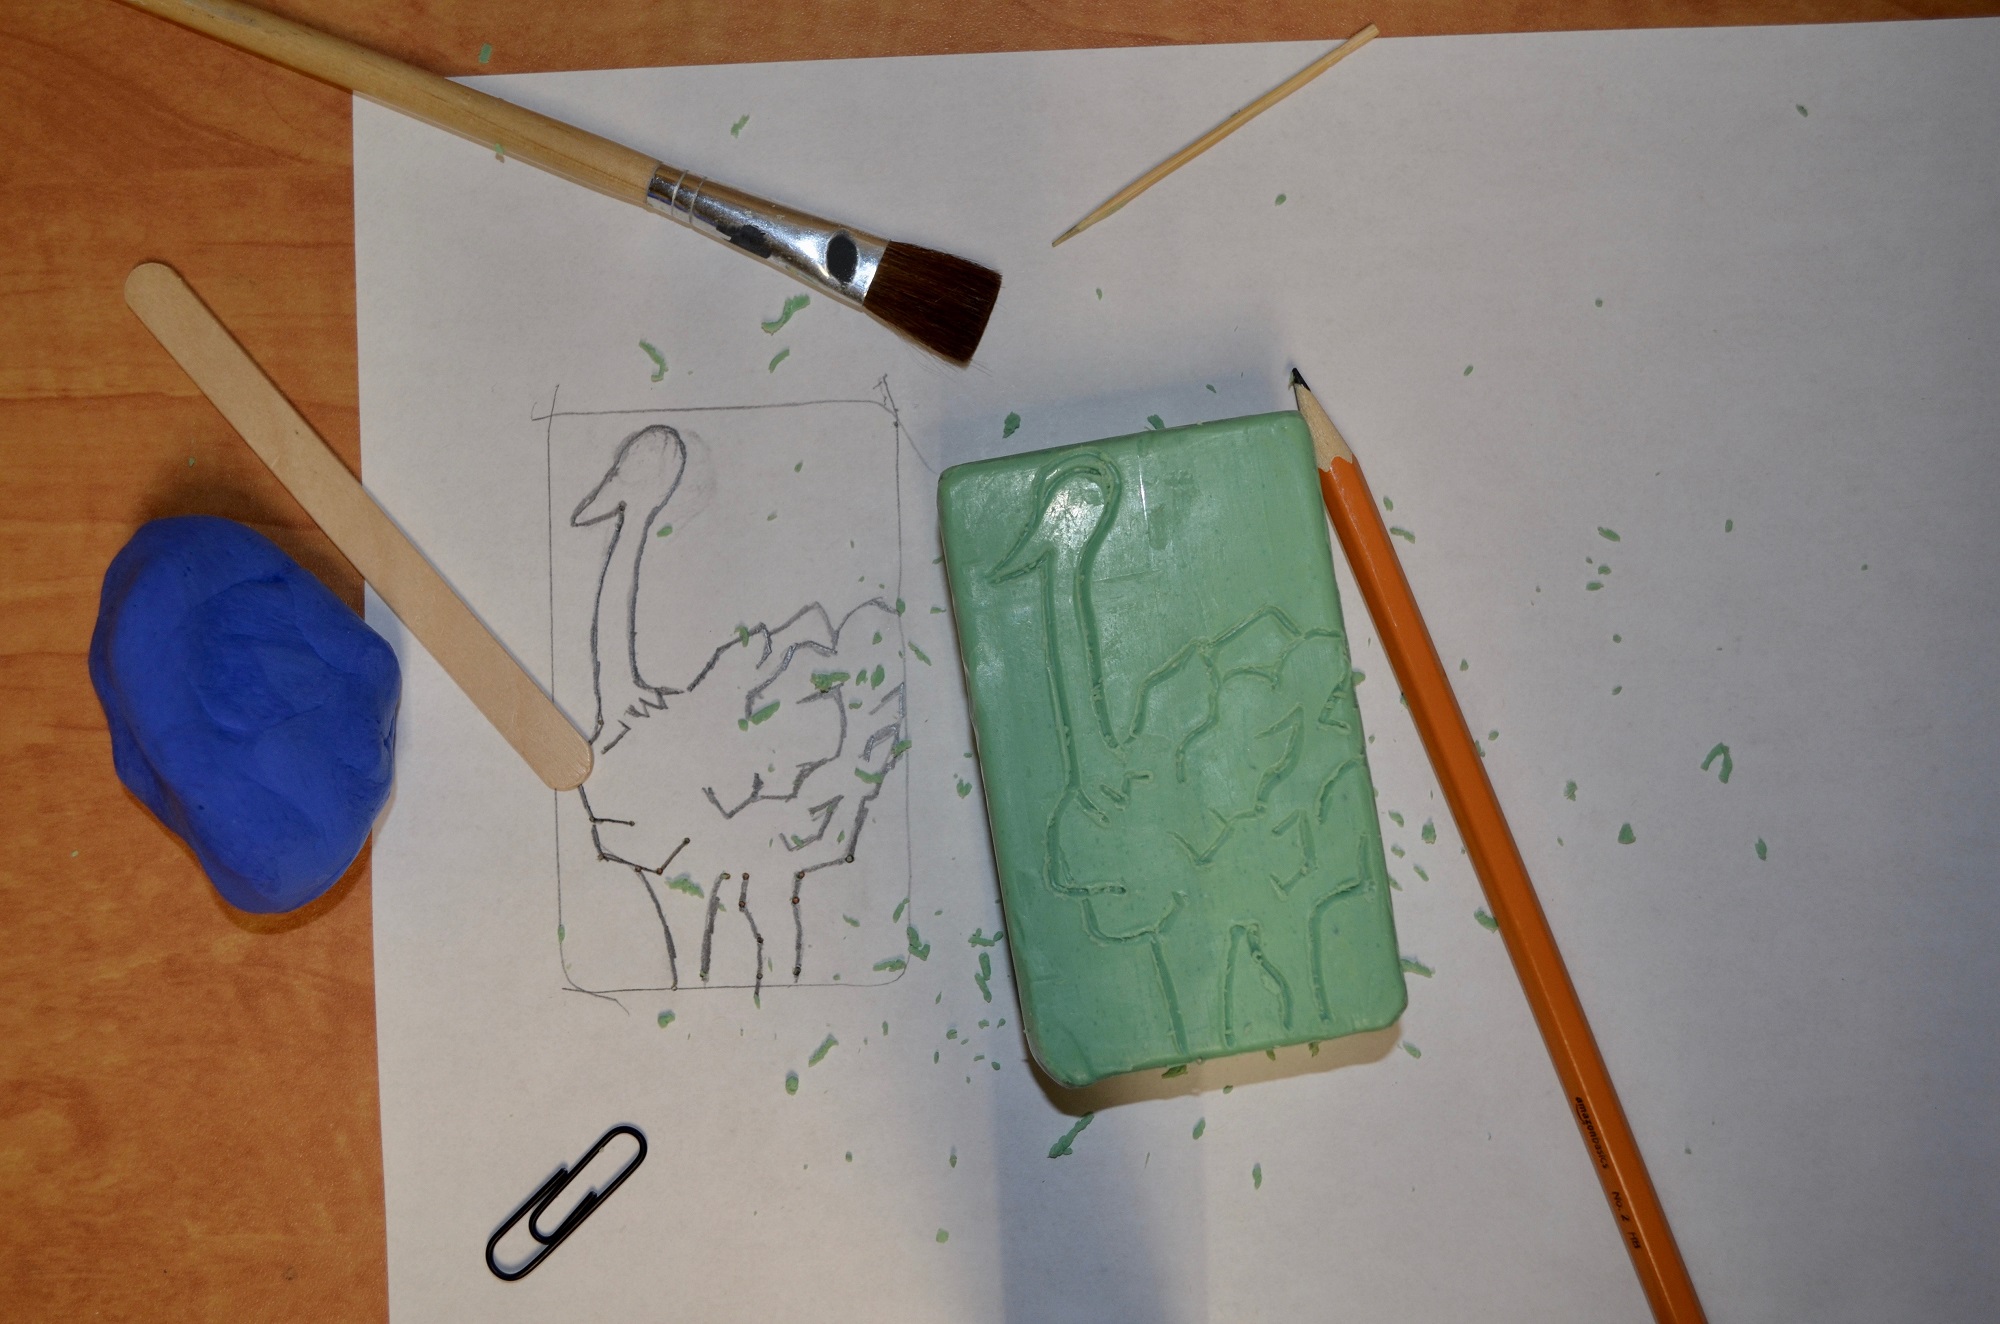
Step Three: Trace
You can draw directly on the soap. If you need extra help, try tracing your sketch onto the soap by placing the paper on top of the soap. Then, go over your drawing with your pencil to create an outline.
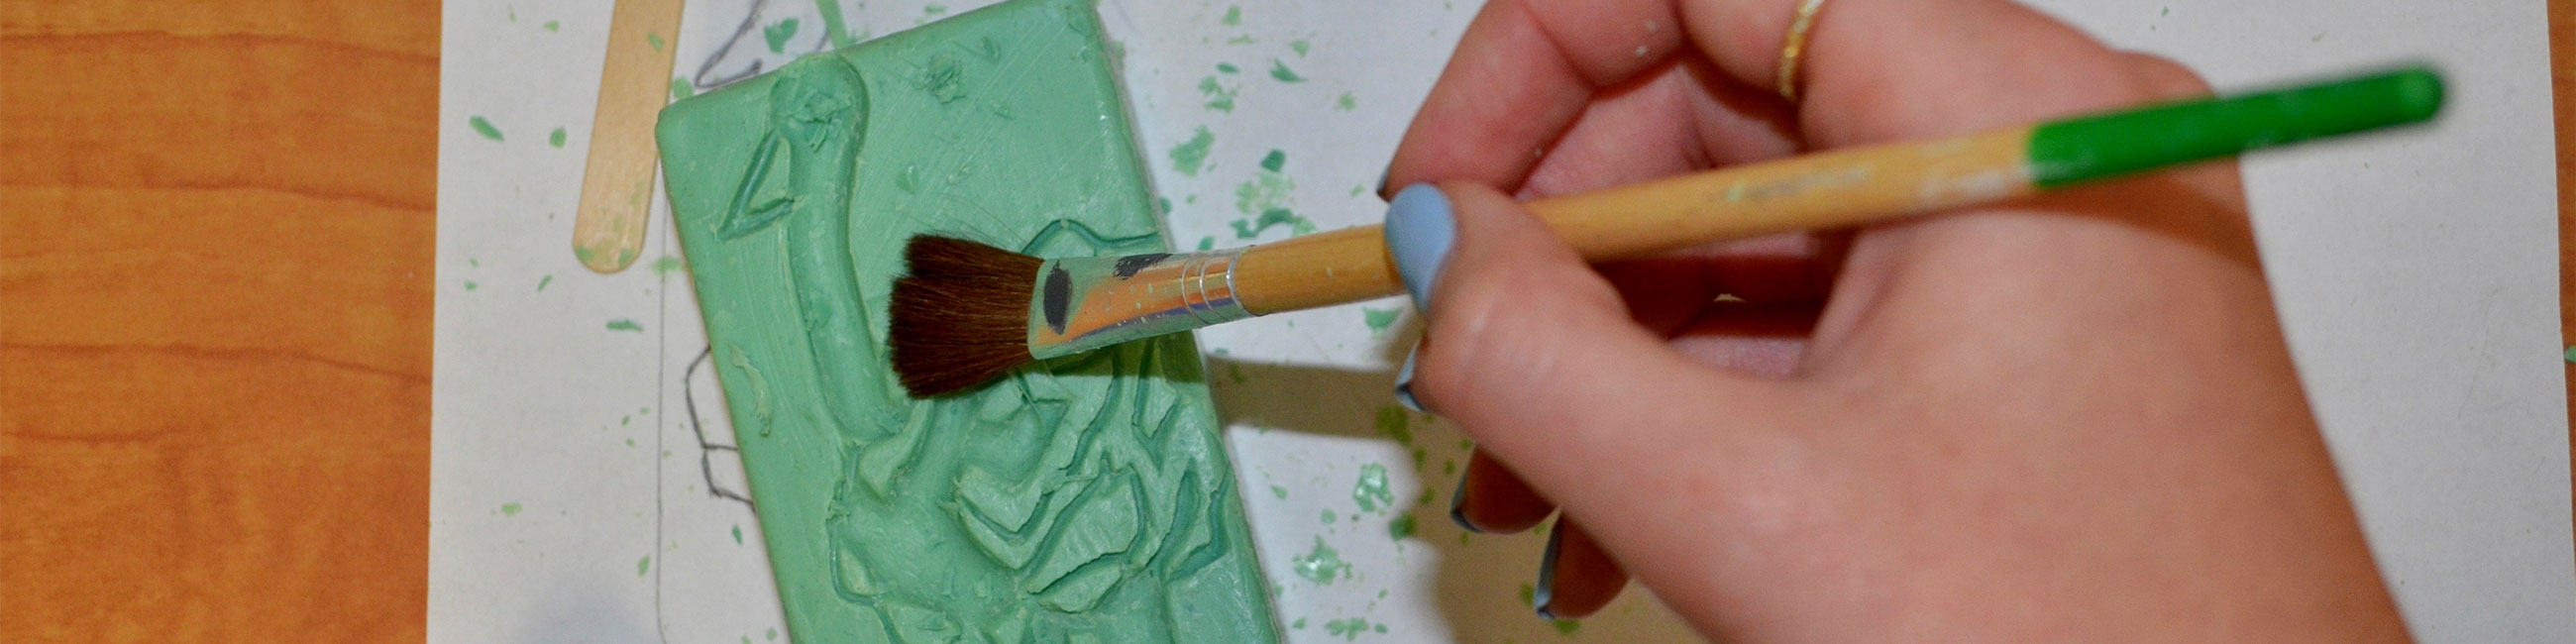
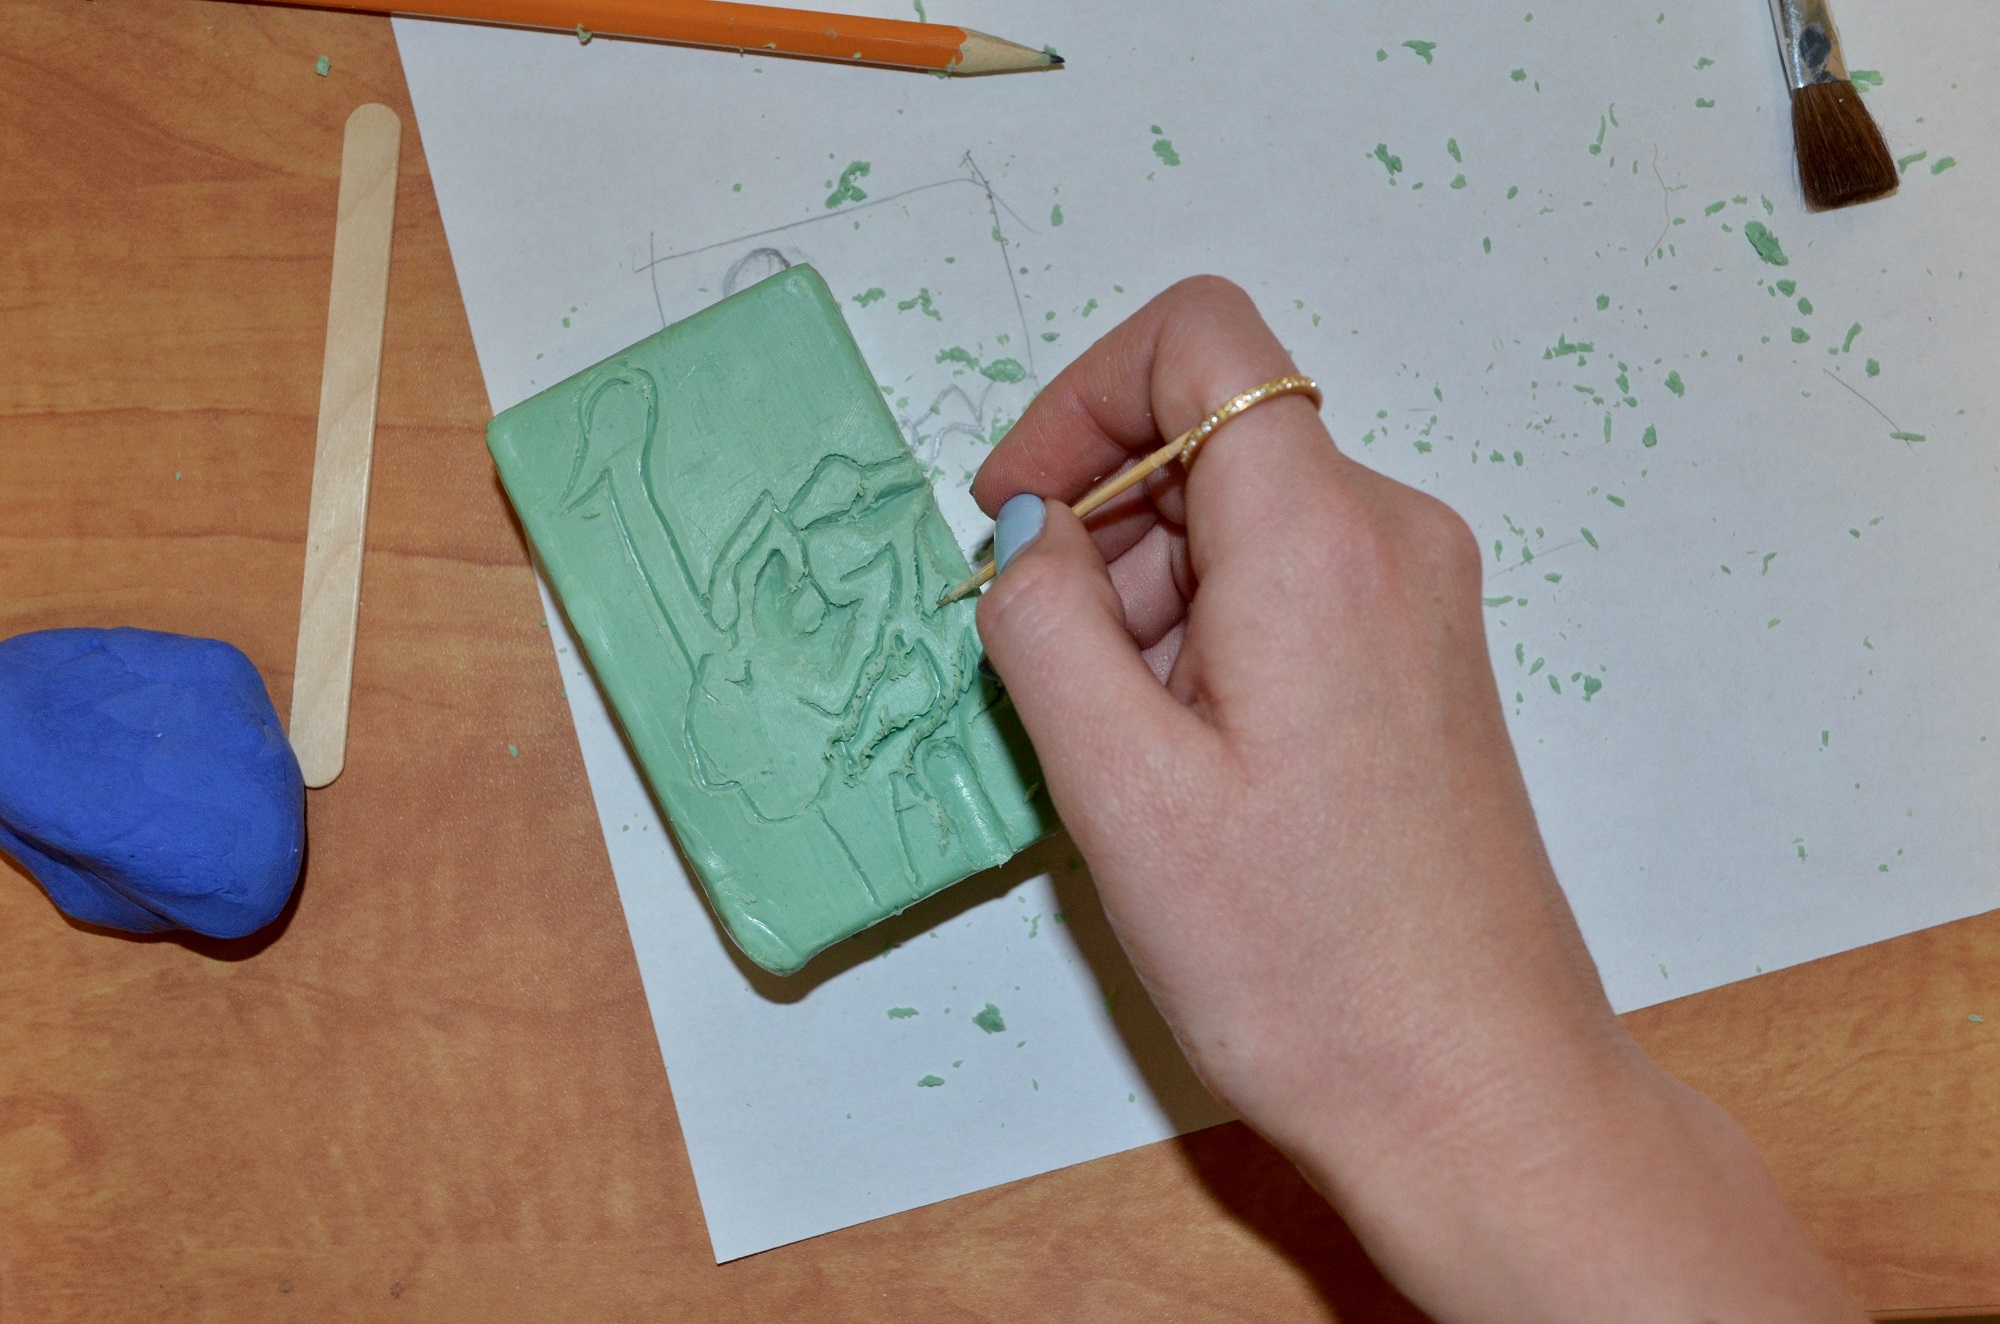
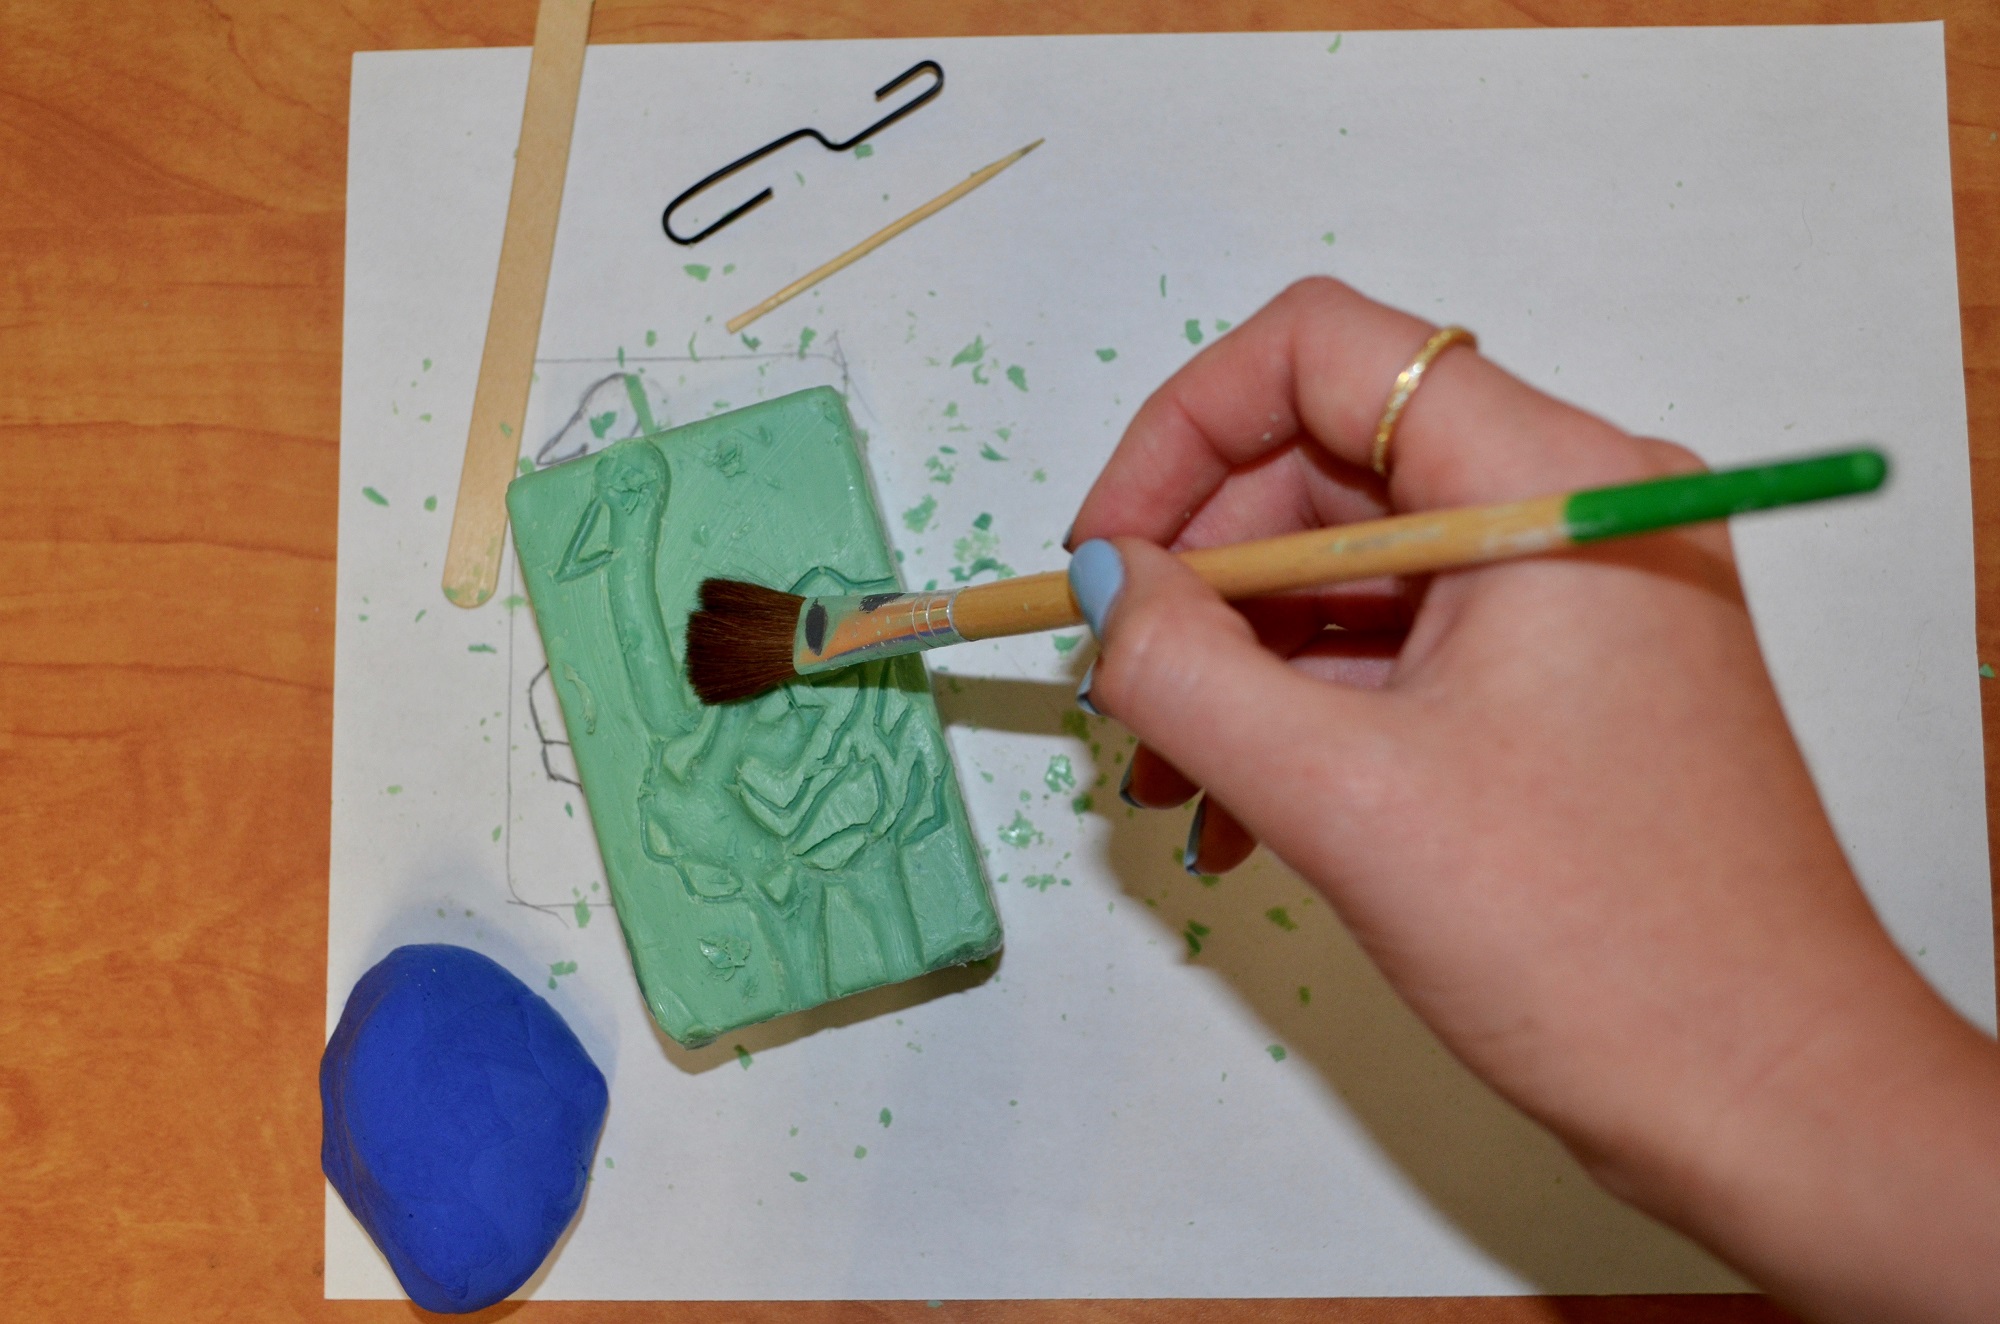
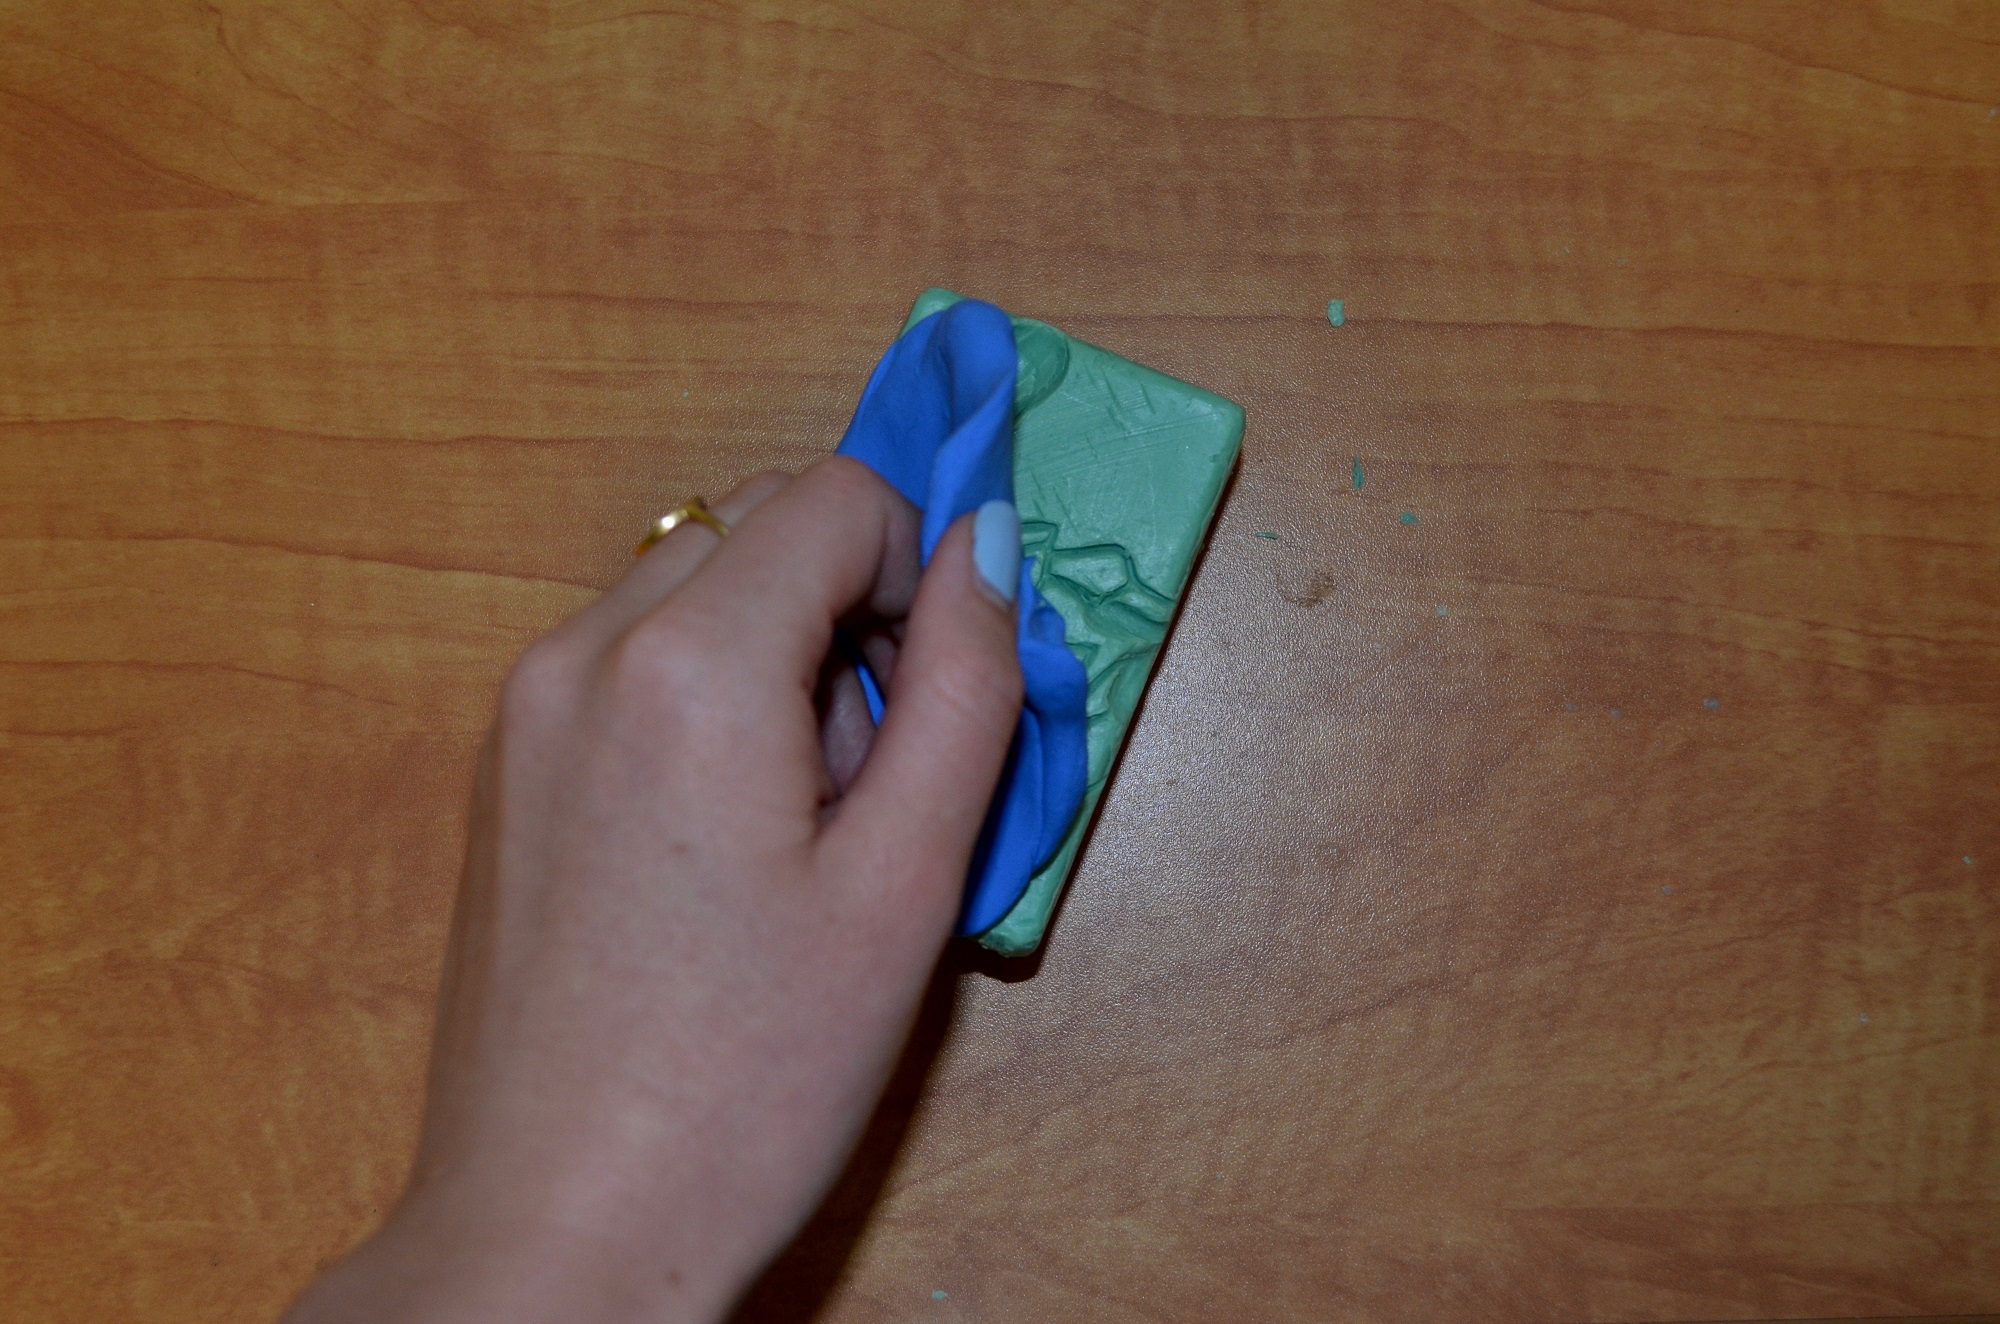
Step Four: Carve
Carve into the soap. The carved spaces will create raised figures in your impression. Before stamping your seal, use a paint brush to clean out the carved spaces.

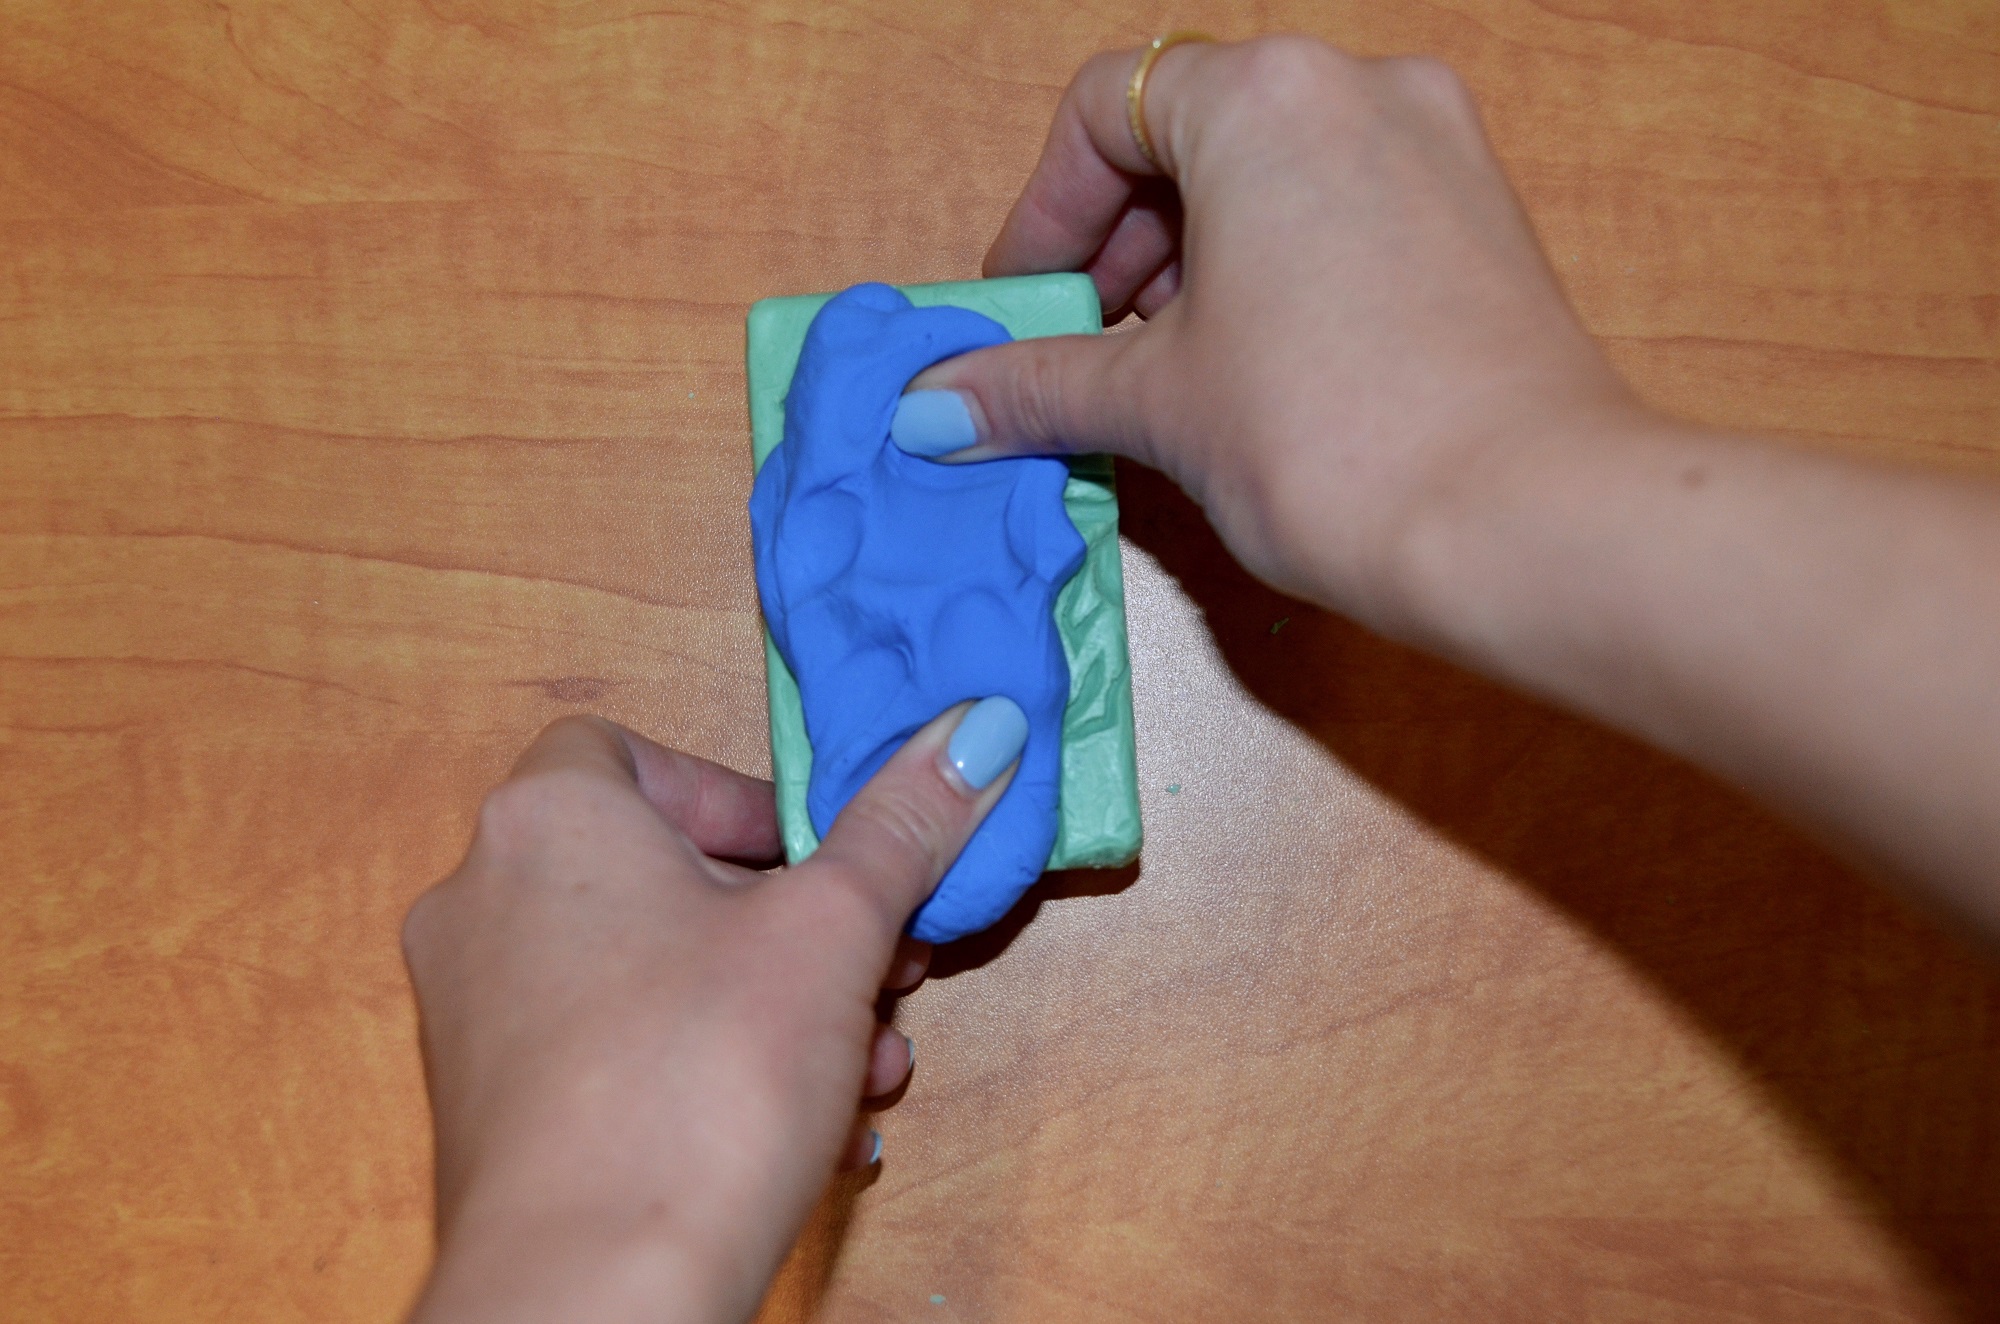
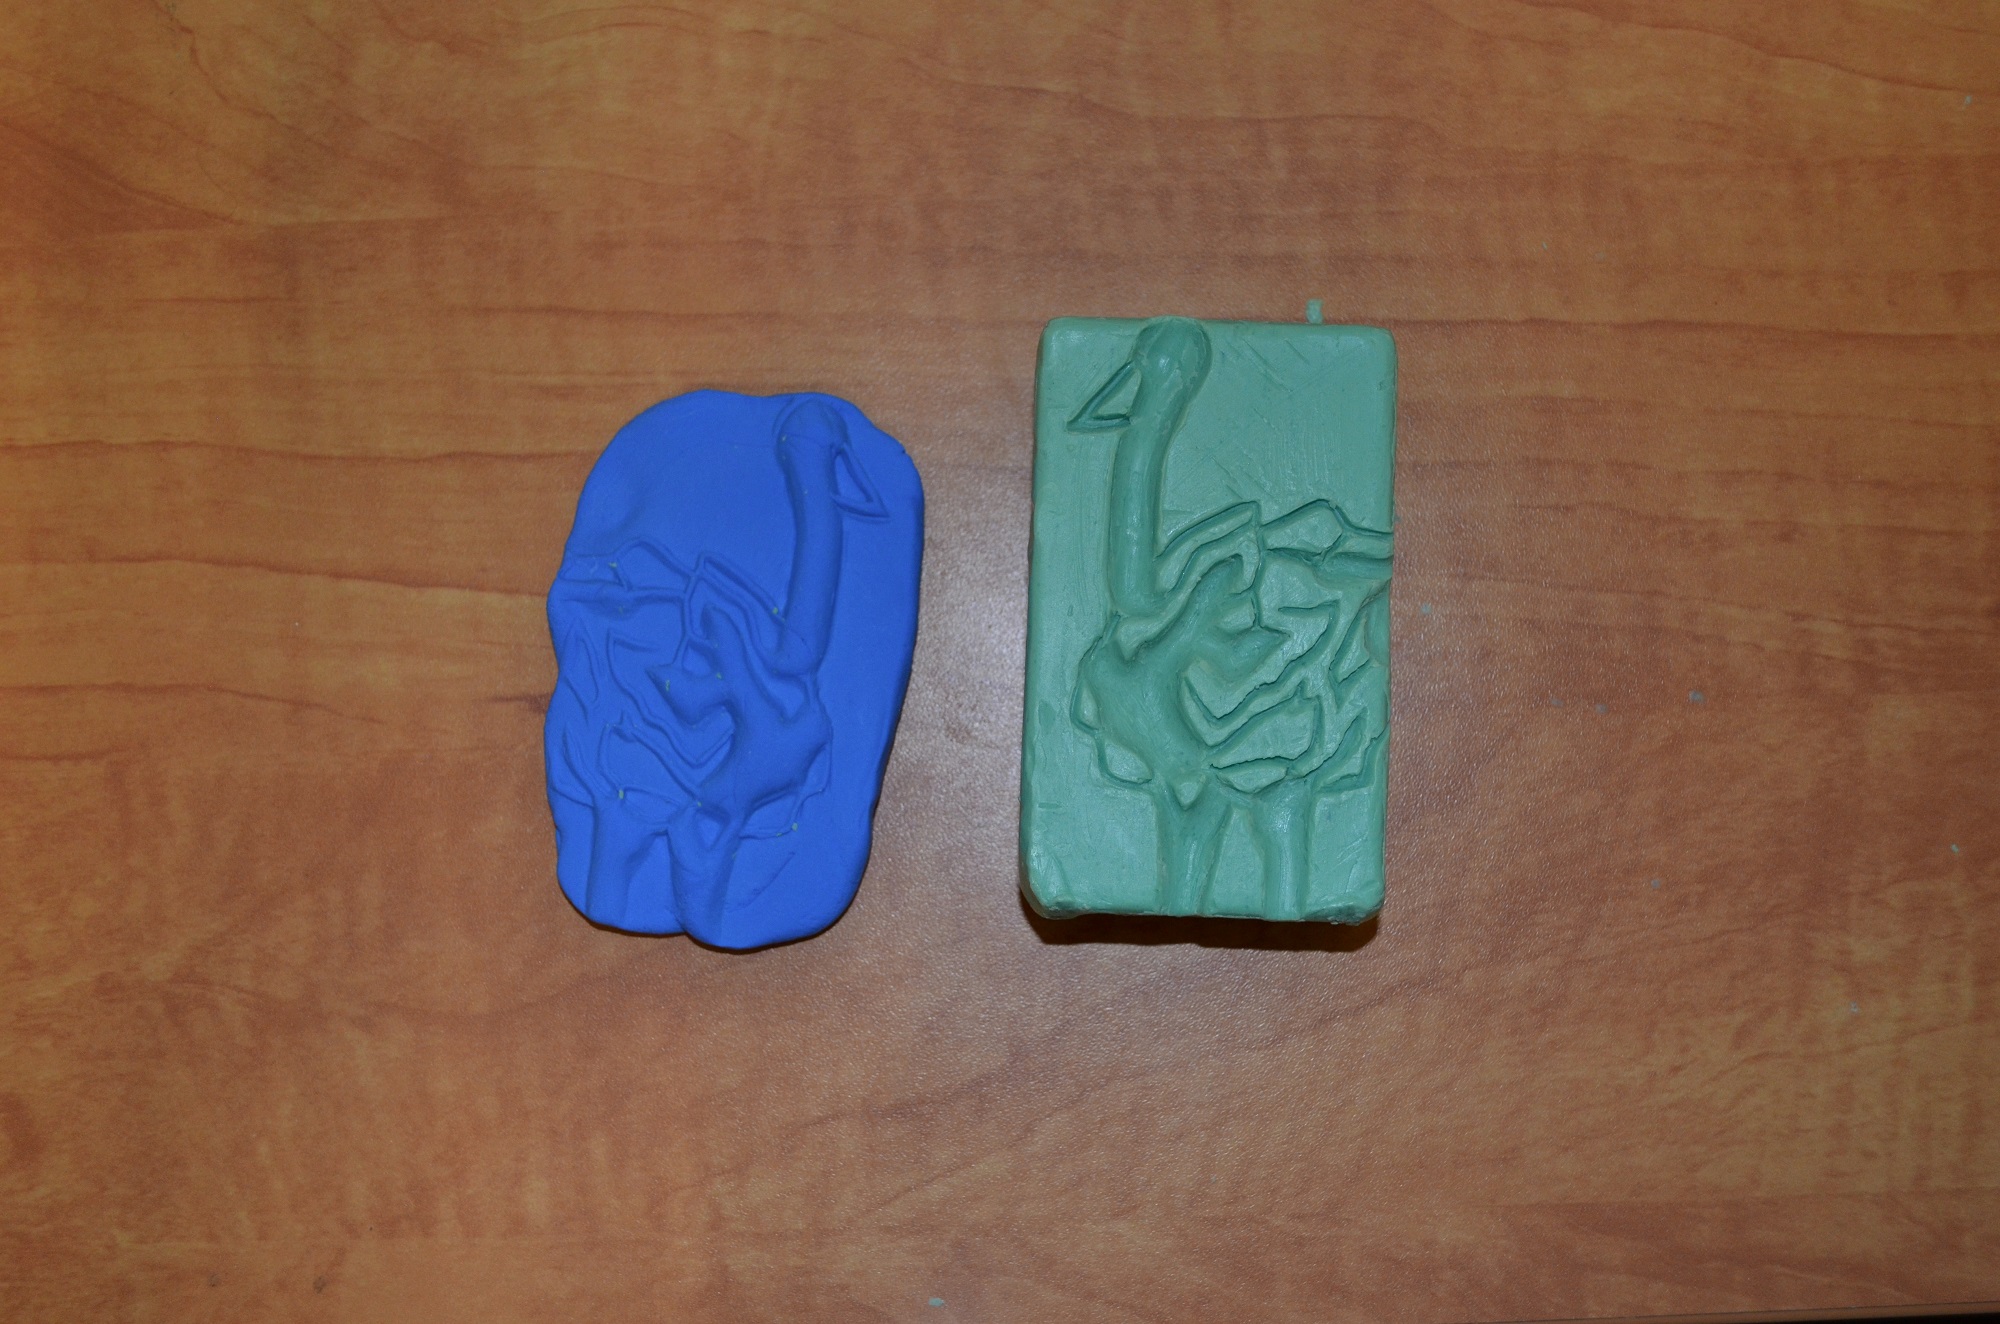
Step Five: Press and Pull
When you have finished your stamp seal press it into a piece of clay. Make sure to press hard, so that the clay picks up all the details!
Step Six: Share
Make sure to share your artwork with the museum and post to social media with #FreerSackler